{gluten-free} Popovers

The most confusing thing about going gluten-free (for me, at least) is the baking. For one thing, gluten-free all-purpose flours cost a gazillion times more than their regular, gluten counterparts. For another, the taste is, well, different. Makes sense, right? White flour tastes different than whole wheat flour; both perform differently than cake flour.

But for someone like me, who isn’t much of a baker to begin with, gluten-free baking is like being in a foreign country where even the alphabet is different.

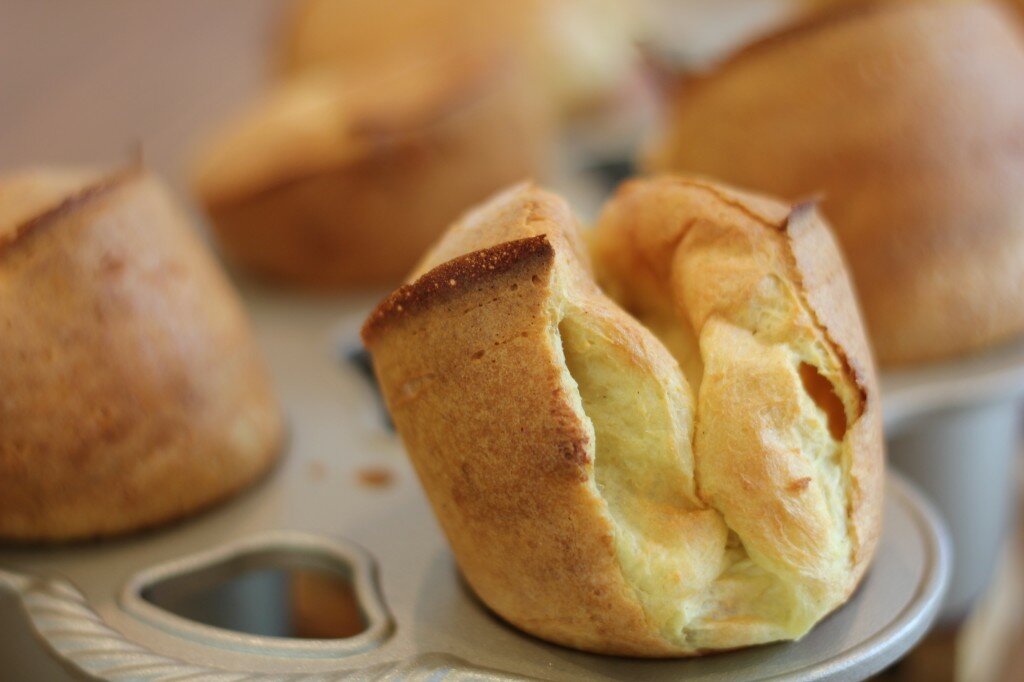
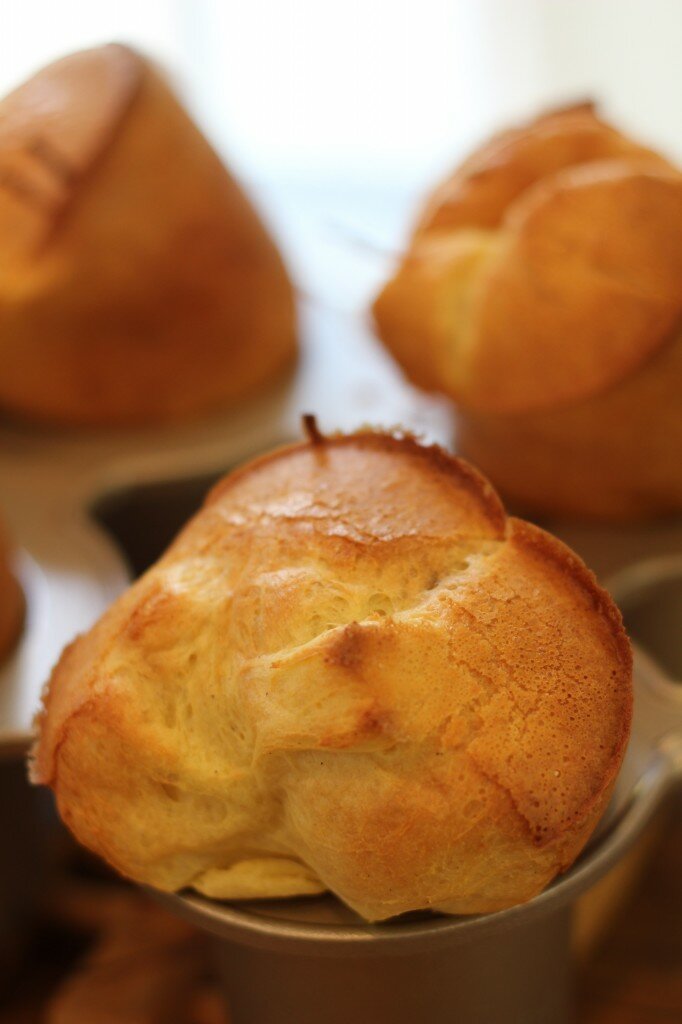
So to ease myself into the shallow end, so to speak, I opted to start with popovers. Mind you, I’ve made popovers just once before and loved them, so my hopes were equally high for the gluten-free version. I used this recipe from the King Arthur Flour website, but used a different brand of all-purpose gluten-free flour which (sadly) had a beany after-taste. (Beany, that’s a word, right?).

Beaniness aside, the popovers were magical. Puffy and creamy on the inside, crisp yet pillowy on the outside. I slathered one, then another, with my favorite strawberry jam, because, as my friend Leanne of Three Dog Kitchen has taught me, “Everything tastes better with jam.”

Even gluten-free popovers.

Get More: Breads & Grains, Gluten-free 5 Comments

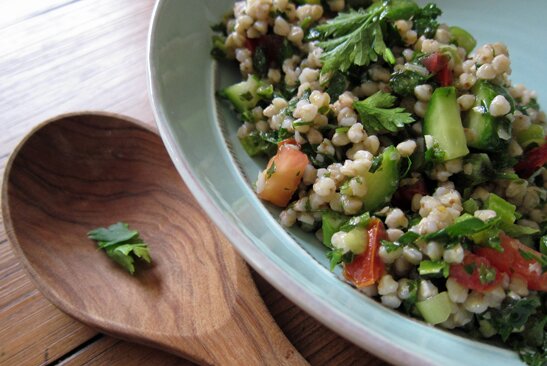
{recipe} Gluten-Free Buckwheat Tabbouleh


I’ve been to Israel only once. I’d like to go back again. There was so much we didn’t see, and so much I’d want to do again, like swim in the Dead Sea, explore the labyrinthian passageways of the Church of the Holy Sepulchre or bask in the rainbow colors of Marc Chagall’s windows at the Hadassah-University Medical Center.

But until I make it back, I have the food to keep me happy. On our first full day in Israel, we drove north from Hafia to Rosh ha-Nikra, Israel’s northern-most point. In fact, Israel’s border with Lebanon can be seen from the parking lot of the Rosh ha-Nikra grottoes. After hiking around the cool damp caves, our group clambered back on the bus and headed east, hugging the Lebanese border. We soon stopped for lunch at Arazim Restaurant in Shlomi.

As I sipped a Coke (my trick for keeping stomach ailments at bay while traveling), plate after plate of Lebanese mezze were placed before our group. Thick hummus served with plump pita bread, spicy lamb nestled against tangy rice…but I only had eyes for the tabbouleh.

More parsley than grain, more vegetable than starch, the tabbouleh at Arazim was so refreshing and filling I could barely keep from leaping across the table to get more.

Back home I eventually mastered a traditional tabbouleh, made with bulgur wheat. In the weeks since eliminating gluten from my diet, I searched like a mad woman for a grain to replace the bulgur, eventually settling on buckwheat. Although settling isn’t really a fair statement: buckwheat is creamy like risotto (without the fuss) yet has a bite like barley. It’s not as nutty as bulgur, but for me, it’s just as good.

Maybe even better.

For more great gluten-free and other allergy-friendly recipes, check out Allergy-Free Wednesdays.

Gluten-Free Buckwheat Tabbouleh
5.0 from 1 reviews
Print
Prep time: 40 mins
Cook time: 20 mins
Total time: 1 hour
Serves: 6-8
This gluten-free version of a traditional tabbouleh is terrific on its own, or add grilled chicken or lamb for a heartier dinner. This dish keeps well and is still good after a day or two.
Ingredients
  • 1 cup buckwheat
  • 3-4 Persian cucumbers, diced (no need to peel)
  • 1 pound small heirloom tomatoes, chopped
  • 1 bunch green onions, whites and tender greens, chopped
  • 1 bunch parsley, chopped
  • 1 bunch mint, chopped
  • 1 garlic clove, minced
  • Zest and juice of one lemon
  • ½ to ¾ cup extra virgin olive oil
  • 2 teaspoons Kosher salt
Instructions
  1. Boil 2 cups water in a medium saucepan. Rinse and drain the buckwheat. When the water boils, add the buckwheat, reduce heat to medium-low, cover and simmer for 20 minutes, or until the water is absorbed into the buckwheat, stirring occasionally.
  2. Combine the remaining ingredients in a large bowl.
  3. Once the buckwheat has cooked, fluff with a fork and add to the vegetables.
  4. Chill for 2-3 hours before serving.
Notes

Adapted from a recipe by Eden Foods.


Get More: Breads & Grains, Gluten-free, Salads, Travel, Vegetables 2 Comments

{recipe} Roast Chicken & Breakfast Potato Salad

One of the best meals of my life was at the Zuni Café in San Francisco. Seriously. It’s one of those nights that will stay with me the rest of my life. Mr. Gonzo and I stole away for a mini-vacay in San Francisco last July. Imagine it: 24 foot-loose-and-fancy-free hours while Gigi had the time of her life with her cousins. Win win!

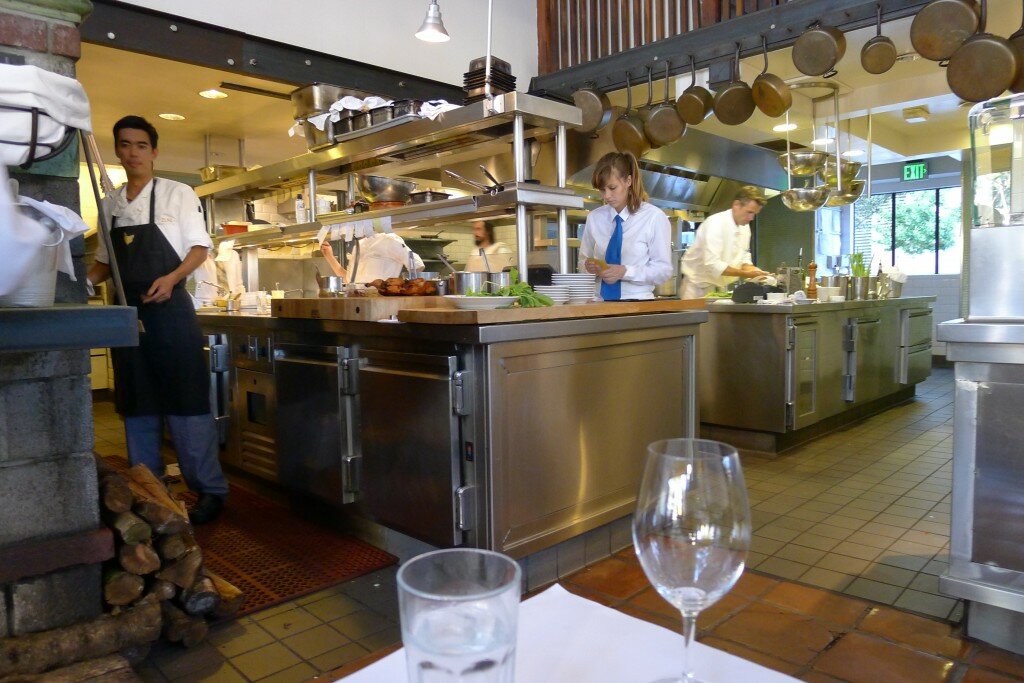
This was the view from our table that night at Zuni:

I know. Amazing, right?

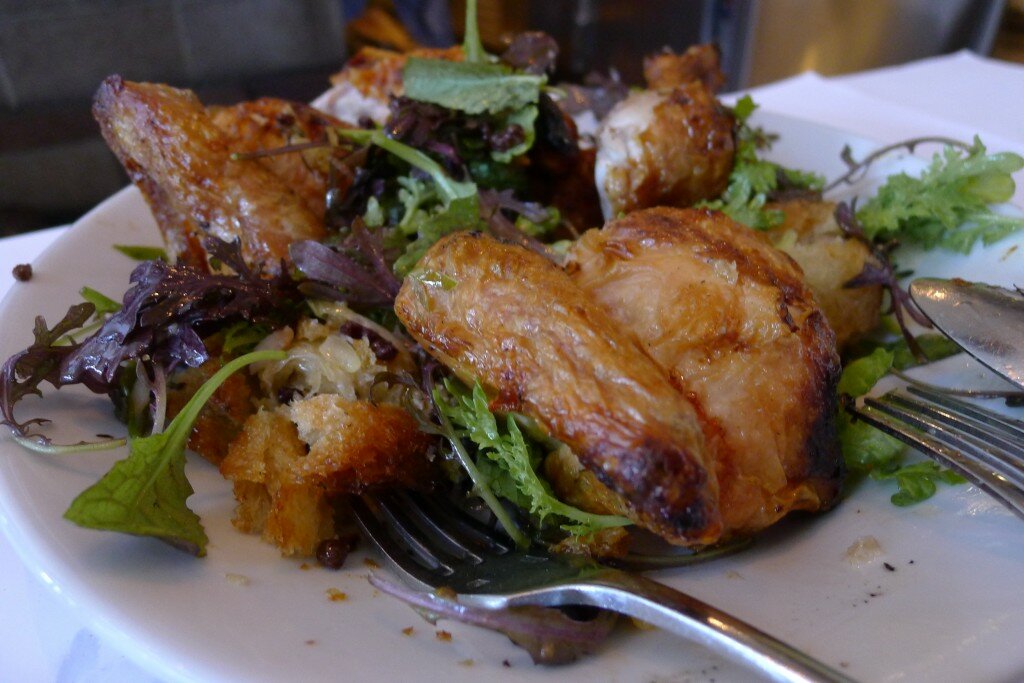
And this was THE meal, the one I’ll always remember. Salty, succulent chicken that fell away from the bone with a mere tug of my fork, crisp yet just-soggy-enough bread dressed with the juices of the chicken, all atop a bed of fresh spring greens:

So the second I got home I did what any cookbook-obsessed food blogger would do: I ordered the . I Googled “Zuni Café Roast Chicken.” I read and reread the five-page recipe until I convinced myself I’d need a degree in program management to get the timing right. Then I procrastinated further because I was simply too lazy to go to the farmer’s market to fetch a small chicken, which is the type of bird called for in the recipe. My Trader Joe’s five-pound bird languished sadly in the fridge until I’d yield, yet again, to the temptation of (the surprisingly easy) Engagement Roast Chicken recipe made famous by Glamour Magazine and Ina Garten.

Then, a few weeks ago, lolling about while recovering from eye surgery, I watched Michael Symon make this recipe. Maybe it was the pain killers, maybe it was his no-nonsense approach to cooking, but I became convinced that I, too, could salt a chicken 24 hours ahead of time without the world coming to an end. And so I instantly thought of the Zuni Café chicken, and how finally, finally I would attempt to recreate that July night in the comfort of my home. While wearing yoga pants.

Yet there was just one thing stopping me: gluten. More specifically, the gluten in the bread salad portion of “Zuni Roast Chicken with Bread Salad.” And while I could, conceivably, make a loaf of gluten-free bread to use for the salad, I’m not that far along in my GF baking, and since I’d already procrastinated long enough, I figured I needed to work out another solution.

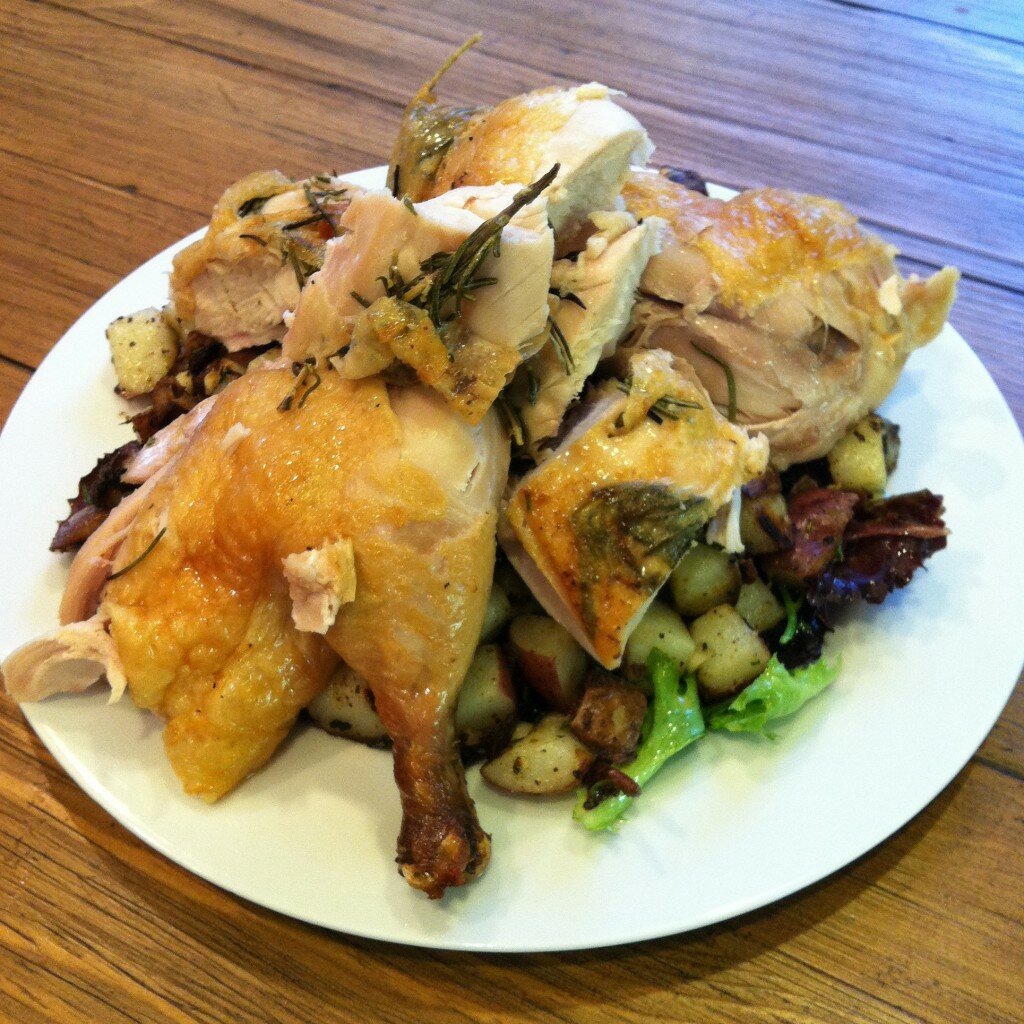
So here it is: Zuni Roast Chicken with Breakfast Potato Salad.

(And if you’d like to take a stab at the original recipe, check out Deb at Smitten Kitchen’s version.)


Roast Chicken & Breakfast Potato Salad
5.0 from 2 reviews
Print
Prep time: 1 hour 30 mins
Cook time: 1 hour
Total time: 1 hours 30 mins
Serves: 4
Don’t be put off by the length of this recipe. Salting the chicken a day ahead actually saves time the day of. Taken in steps, this takes about an hour and a half to prepare. And it’s worth it, believe me. So just prep the breakfast potatoes while the chicken rests on the counter and the oven heats up. While the chicken is in the oven, prepare the breakfast potatoes and make the Champagne vinaigrette. Once you tuck into this savory roast chicken, you’ll feel like you’re back at the Zuni Café, even if you’re in your yoga pants.
Ingredients
  • For the chicken:
  • One whole chicken, 4-5 pounds
  • 4-5 springs of fresh Rosemary, Sage or Thyme
  • 4 teaspoons sea salt (Kosher is fine, too)
  • 2 tablespoons bacon grease or melted butter (optional)
  • For the potatoes
  • 4-5 red potatoes, diced (no need to peel)
  • 2 tablespoons extra-virgin olive oil
  • 1 teaspoon salt
  • 1 tablespoon butter
  • 1 garlic clove, chopped
  • 2 springs fresh Rosemary, chopped
  • For the salad:
  • 1 teaspoon Dijon mustard
  • ¼ cup Champagne vinegar
  • 1 teaspoon Kosher salt
  • ½ cup extra-virgin olive oil
  • 1 package Trader Joe’s bagged Herb Salad Mix (or similar)
Instructions
24 Hours in Advance:
  1. Remove the gizzards and what-not from inside the chicken. Rinse the bird, inside and out, with cold water. Using paper towels, dry the chicken, including the inner cavity (this will help the chicken brown better).
  2. Gently ease the skin apart from the breast on each side and slide the Rosemary into the openings. Pat the chicken all over with the salt.
  3. Tie the chicken’s legs together and tuck each wing under the body.
  4. Place the chicken into a dish, cover with plastic wrap and refrigerate.
Roast the chicken (day of):
  1. Remove the chicken from the refrigerator at least 30 minutes in advance.
  2. Place a 10-inch cast iron skillet into the center of the oven, then set the oven to preheat at 475°.
  3. Dry the chicken again with paper towels. Smear the chicken with the bacon grease or melted butter, if using.
  4. When the oven is ready, carefully remove the skillet. Transfer the chicken, breast side up, to the skillet.
  5. Roast for 30 minutes, remove from oven and flip the bird over.
  6. Roast for 10-20 minutes more, remove from oven, and flip the bird over again.
  7. Roast for a final 10-15 minutes, breast side up, until the chicken reaches 160° or the juices run clear. Set aside and let rest while you finalize the breakfast potato salad.
Prepare the breakfast potatoes:
  1. While the chicken roasts, prepare the breakfast potatoes.
  2. Warm the olive oil in a 12-inch skillet over medium heat. When the oil is hot, add the potatoes in a single layer and sprinkle with the salt; this ensures an even crust. Let the potatoes sit for 8-10 minutes, or until a crust begins to form. Don’t let your husband stir the potatoes.
  3. Once the potatoes have formed a crust, turn them over to allow the other side to crisp, another 6-8 minutes. Don’t stir until the crust forms.
  4. Once the potatoes are browned on both sides, begin to stir and flip to ensure even cooking, another 10-15 minutes, or until the potatoes can be pierced with a knife.
  5. Add the butter, chopped garlic and chopped Rosemary to the pan, stir and once the butter has melted, remove from heat.
Make the vinaigrette:
  1. In a clean glass jar with a lid, combine mustard, vinegar and salt. Secure the lid and shake until all ingredients are combined.
  2. Pour in the olive oil, secure the lid and shake again. Taste, using a fresh salad leaf, and adjust the seasonings as needed: if it tastes bland, add salt; too oily, add vinegar; too sharp, add a teaspoon of oil: play around until you find a taste you like.
Assemble the dish:
  1. Carve the chicken into pieces, reserving the juices for another use.
  2. In a large bowl, combine the herb salad mix and ¼ cup of the Champagne vinaigrette (more to taste). Pour the breakfast potatoes into the bowl and gently stir to combine.
  3. Layer the breakfast potato salad on a large platter, then place the chicken on top of the salad.
  4. Serve immediately.
Notes

Adapted from and

For more great gluten-free ideas, check out Allergy-Free Wednesday at The Tasty Alternative.

Get More: Gluten-free, Meat, Poultry, Salads, Vegetables 5 Comments

{recipe} Chopped Salad with Chicken & Salami


I’ve never in my life felt better than I’ve felt the past two and a half weeks. I’m sleeping through the night, my skin is clear, my stomach is (relatively) flat, even the whites of my eyes are, well, whiter.

Why? I gave up gluten.

Gluten is all around us, and not just in our bread, pizza and cereal. It’s in our bottles of salad dressings, our boxes of chicken stock, our packets of chili spice mix, our bags of cookies, chips and treats we’ve grown to love in our processed-food culture. It’s even in our cosmetics.

But for me, it’s no longer in my system.

What started as an experiment after my stomach ballooned up alarmingly following an innocent bowl of cereal has turned into the beginning of a way of life. When faced with pizza emerging fresh from the oven at book club last week, I enjoyed the undeniably intoxicating whiffs I caught from my friends’ plates as I tucked into a giant green salad. In considering how to make the famous Zuni Café roast chicken with bread salad, I decided to experiment with roast potatoes instead.

I haven’t mastered, or even attempted, for that matter, the art of baking gluten-free bread.  The store-bought example I had was inedible (I suspect, in the bread’s favor, I should have toasted it first). But other than bread, I’ve had cereal every morning (Rice Chex or Corn Chex) and enjoyed pizza and movie Friday nights with my family (thanks to Bob’s Red Mill pizza crust mix).

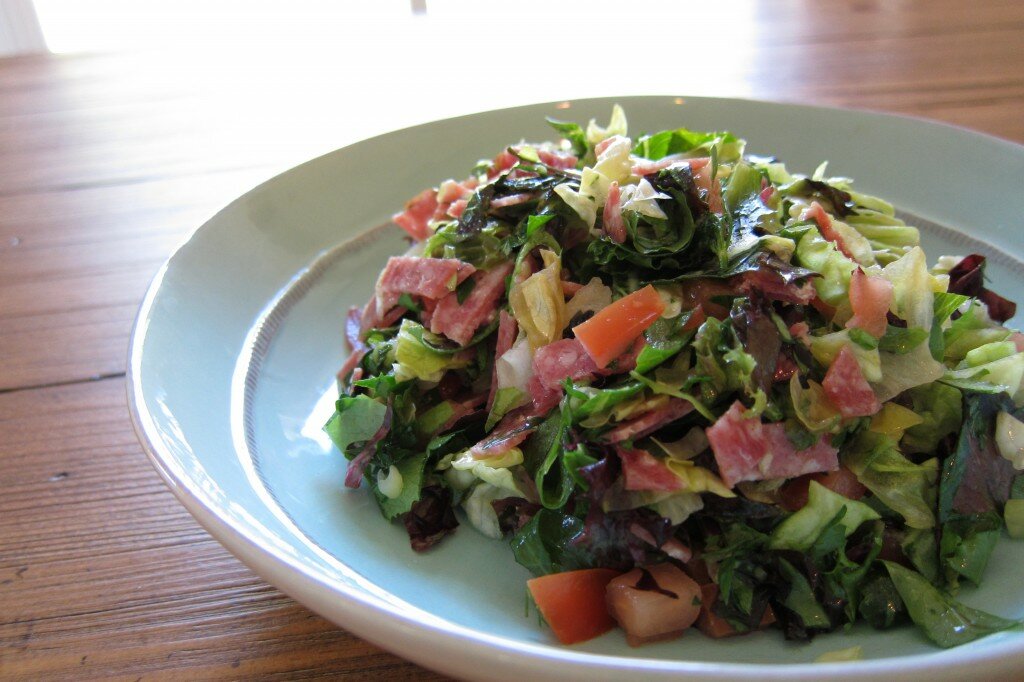
For lunch, I’ve relied on this salad, inspired by the original chopped salad at California Pizza Kitchen. With a mix of butter lettuce and Mesclun, sliced green scallions, julienned basil, handfuls of Italian parsley and a diced tomato, I’m easily getting more than my daily allowance of vegetables; I like my salads big. Add to that some chopped salami and leftover chicken, and you’ve got yourself a meal.

Even if you can’t pass the bread.

Chopped Salad with Chicken & Salami
5.0 from 1 reviews
Print
Prep time: 15 mins
Total time: 15 mins
Serves: 1
This salad is inspired by my favorite gluten-free salad, CPK’s original chopped salad. To bring out the flavor of the salami, I chose a mustard-based vinaigrette paired with a crisp Champagne vinegar. This is an idea take-to-work lunch; assemble the salad and store in a plastic container, keep the dressing separate, then assemble at work. I like to shake the salad instead of toss it – just make sure you keep the lid on tight.
Ingredients
  • For the salad
  • 1 cup chopped butter lettuce
  • 1 cup chopped Mesclun
  • 2 scallions, chopped
  • ¼ cup chopped Italian parsley
  • 3-4 fresh Basil leaves, sliced into ribbons
  • 1 tomato, seeds removed, diced
  • 1-2 ounces Genoa or Italian Dry salami, chopped
  • 2 ounces cooked chicken or turkey breast, chopped
  • For the vinaigrette
  • 1 teaspoon Dijon mustard
  • ¼ cup Champagne vinegar
  • 1 teaspoon Kosher salt
  • ½ cup extra-virgin olive oil
Instructions
Make the vinaigrette:
  1. In a clean glass jar with a lid, combine all vinaigrette ingredients except the olive oil. Secure the lid and shake until all ingredients are combined.
  2. Pour in the olive oil, secure the lid and shake again. Taste, using a fresh salad leaf, and adjust the seasonings as needed: if it tastes bland, add salt; too oily, add vinegar; too sharp, add a teaspoon of oil: play around until you find a taste you like.
Assemble the salad:
  1. Add the salad ingredients to a large glass or plastic storage container.
  2. Drizzle two tablespoons (more or less to taste) over the salad.
  3. Secure the lid and shake the salad so the dressing coats the entire salad.
  4. The key to a great chopped salad is ensuring an even coating of the dressing. Believe me, it makes all that chopping worth it.
Notes

Please check any store-bought ingredients to ensure they’re gluten free if that’s a dietary concern for you.


For more allergy-free recipes and tips, visit Tessa the Domestic Diva every Wednesday for Allergy-Free Wednesdays.

Get More: Gluten-free, Meat, Salads, Vegetables 4 Comments

{recipe} Lemon & Basil Pesto

“Mommy, I love it!”

Nothing sounds as sweet as those four words emitted from the mouth of a picky eater. My Gigi is an adventurous girl and never says no to escapades that would send most little girls into hiding. So far in her short, sweet life she’s whizzed down a zip-line, shot paintballs at camp counselors and climbed rocks to heights that make me dizzy, just to name a few of her adventures. And if you ever agree to tag along with us for a day at Disney’s California Adventure Park, be prepared to take her on California Screamin’. Twice. That’s how much she loves the adrenaline rush.

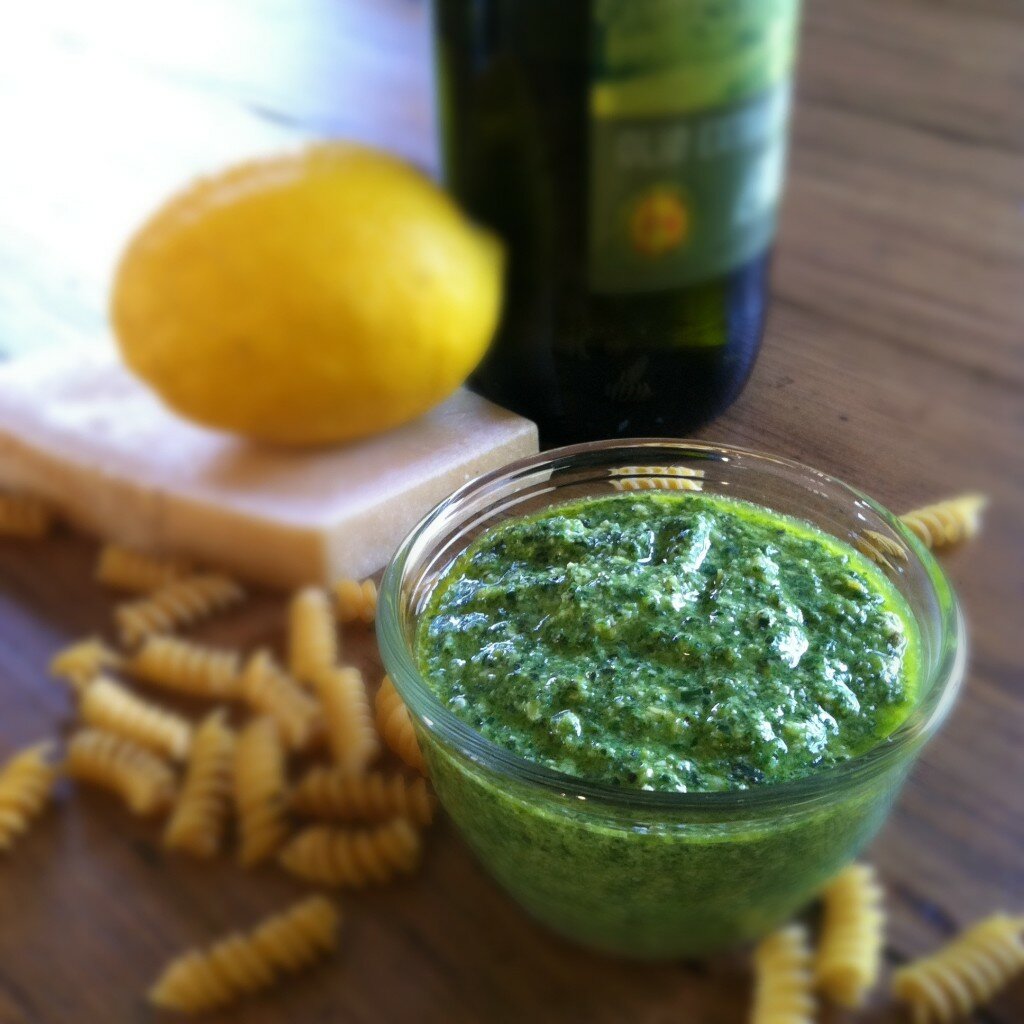
Lately, her adventurous streak is winning points in the kitchen, too. Take this pesto, for example, which is adapted from a recipe by Food & Wine. I made this on Monday, refrigerated it overnight (which only made it better, not that there’s anything left to prove my point), then served it up Tuesday after a particularly hectic day which involved me continuing to recover from eye surgery in between researching gluten-free baking and shuttling back and forth between school, karate and a friend’s house.

Anyway! I liberally poured the pesto over bowls of steaming hot pasta, still blanketed in a wee bit of cooking water, then served Gigi a bowl of plain noodles with freshly grated Parmesan cheese. I gave her a taste of the pesto-covered pasta, promising an extra Thin Mint if she goobled it up. (Judge all you want, until you’ve harbored a picky eater under your roof, you’re incapable of knowing the efforts one will undertake to get them to try new foods.) We hyped the pesto as a creamier, cheesier version of her favorite Gigi pasta.

She took the first bite. A hesitation. Then another, larger this time. Then a third, then the entire bowl. Then – miracle of all – she asked for more.

Yes, more.

So if you need me today, I’ll be in the kitchen. Making pesto. For my picky adventure seeker who maybe isn’t so picky anymore….

Lemon & Basil Pesto
5.0 from 1 reviews
Print
Prep time: 20 mins
Total time: 20 mins
Serves: 4
This pesto is a family milestone in that it’s a new food for our little Gigi, who is notoriously picky and known far and wide for her love of pasta. Try this with your favorite picky eater and see if it turns her into a foodie, too. Adapted from a recipe by Joanne Weir from Food & Wine.
Ingredients
  • 2 cups basil leaves
  • 3 tablespoons pine nuts
  • 3 medium garlic cloves, peeled & smashed
  • Zest of one lemon
  • Juice of one lemon
  • ¼ cup freshly grated Parmigiano-Reggiano cheese
  • 1 teaspoon kosher salt
  • ½ cup extra-virgin olive oil
Instructions
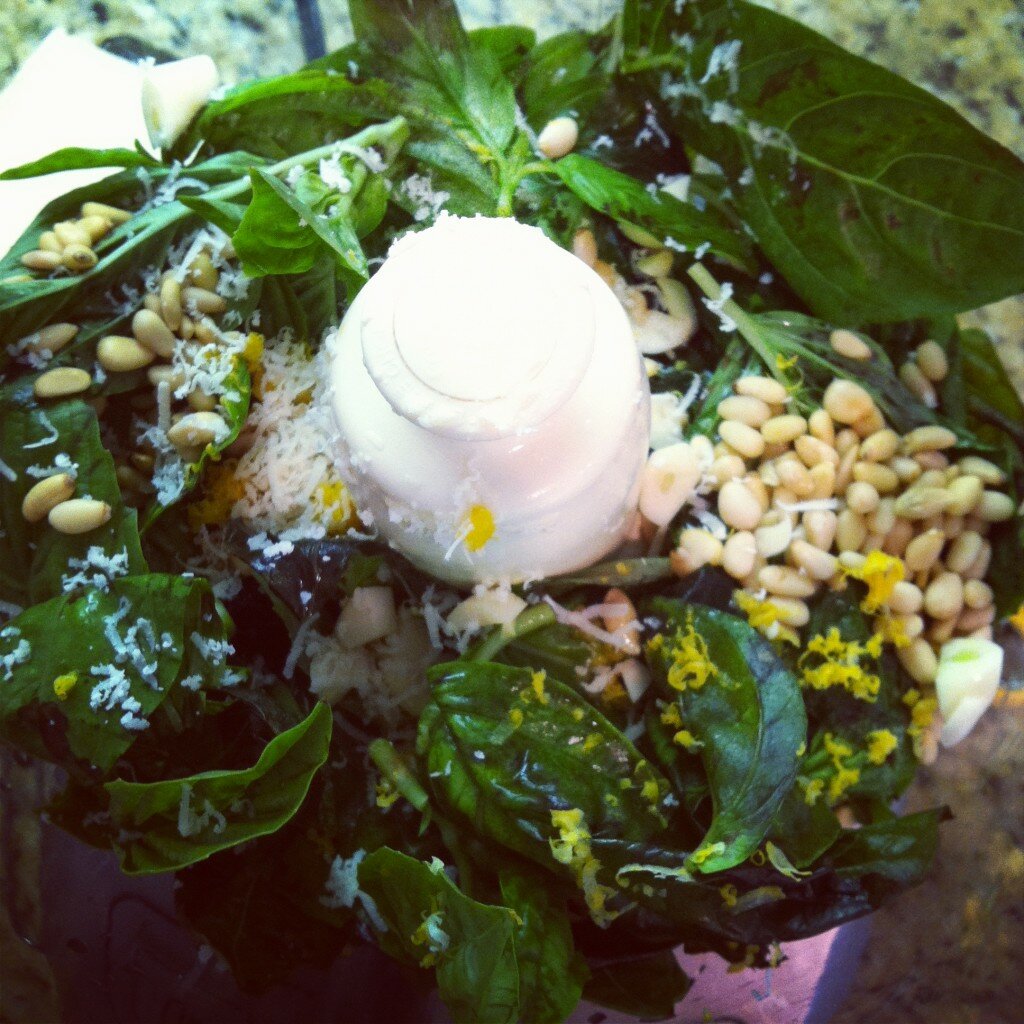
  1. Combine all ingredients except the olive oil in the bowl of a food processor. Pulse lightly to chop, scrapping down the sides as needed.
  2. Slowly drizzle in the olive oil through the spout of the food processor, scrapping down the sides as needed.
  3. Serve immediately, on pasta, fish or chicken, or store in an airtight container overnight.


Get More: Pasta, Tips & Techniques, Vegetables 5 Comments

Writing Workshop with Dianne Jacob

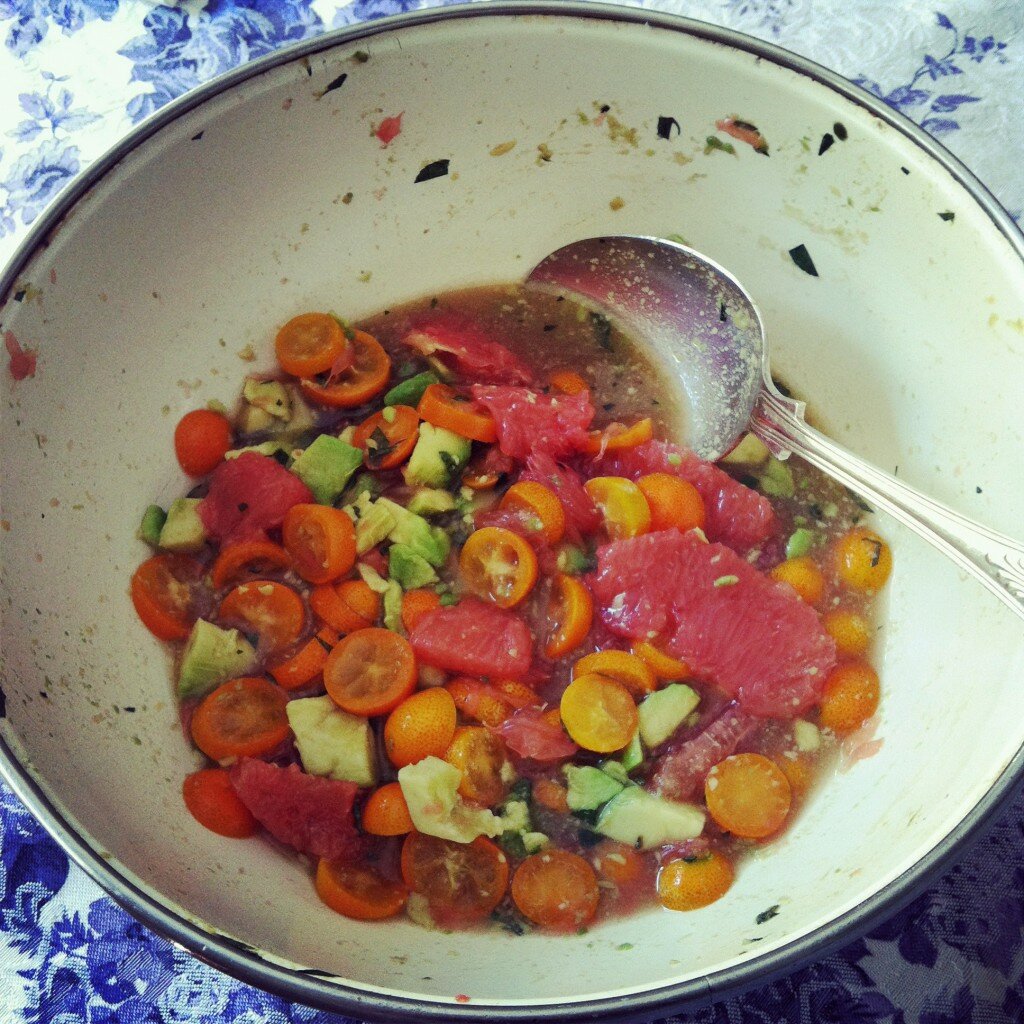
Last weekend I spent the day with food blogging friends new and old. We ate (of course!) but really, we came together to hear Dianne Jacob lecture on food writing, from restaurant reviews to blogging to cookbooks, using her book . Since I’m recovering from a minor surgery I’m going to share with you the piece I wrote from Dianne’s prompt to use the senses. One bit of that gorgeous salad pictured above sent me into a writing freenzy!

Growing up as a picky eater is like wearing black t-shirts all the time. There’s nothing inherently wrong with either scenario, but there’s nothing terribly exciting, either. Color is chaos, it’s fireworks any day but the fourth of July. Now, a few days into eating without gluten, I’m beginning to wonder what else is out there for girls like me who have a sweet tooth in the morning. Out goes cereal dancing with berries, oatmeal crowding out a banana, wheat toast smothered in almond butter and draped with apples.

Consider instead a bright fruit salad, one all the more delicious because I didn’t have to peel the grapefruit or source the ripe avocados. But what almost stopped me in my tracks were the kumquats: I don’t even know what those are. Sure, I’ve heard of kumquats, but if you handed one to me I’d hand it back with a faint smile, assuring us both that I have no clue what I’m doing.

The tang of the grapefruit I recognize from when my mother would serve them with crystals of sugar sparkling in the morning light. Against that sourness the creamy texture of the avocados is welcome – to have both in one bite is why I live in California, where seasons are seasonless and I’m only just beginning to understand that the rest of the world doesn’t have our fruits year round like we do.

The kumquats are smaller than grapes; at first I thought they were cherry tomatoes (other than the fact that they’re as bright as tangerines). Unlike the grapefruit, they’re not peeled, and that’s a texture I’m not used to. It’s how I imagine an orange peel would taste if I were to ever eat one, the way I see some men suck on lemon rinds.

For more pictures and writing tips, please visit these lovely blogs:

  • Gorgeous food photography from Averie at Love Veggies & Yoga
  • The recipe for this salad from Stephanie at Recipe Renovator; Stephanie was also kind enough to share my essay in this post
  • Ani from Confessions of a Foodie shares both glorious photography and a recipe for her to-die-for Brunch Casserole with Spinach, Ham, Egg, Bread & Cheese (rich, creamy, melt-in-your-mouth amazingness)

Naturally there was lots of food! I didn’t contribute a thing thanks to the nine-hour SDG&E blackout the night before which would have rendered my (planned) Chicken & Bulgur Wheat Salad unsafe for human consumption. Luckily, my fellow bloggers were more than generous with their dishes! In addition to Stephanie’s gorgeous salad and Ani’s strata, there was a cheese plate, Russian tea cakes, brownies with Oreo centers, a rustic beet salad, a refreshing strawberry sorbet, and a hearty lentil soup.
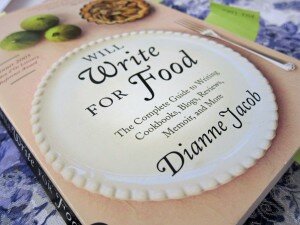
You can see from the broken binding and forest of Post-it notes that this is a well-read book!

Dianne worked with us on blogging, reviews, cookbooks, ethics, and more.

I’m never far from my iPad and iPhone … and can’t help wishing those cameras in the background belonged to me.

Lunch is served.

If you live in Southern California be sure to check out Dianne’s upcoming workshop; details here.
Get More: Et cetera 5 Comments

A Girl Can Never Have Enough…Cookbooks

I have a serious cookbook obsession. What started as a small collection of titles has turned into what Mr. Gonzo might qualify as an avalanche. In fact, I’ve heard him suggest the unthinkable: that I don’t need any more cookbooks.

Any woman with a closet full of shoes will agree – there’s a difference between need and want. And so, thanks to a recent birthday when I declared that all I wanted was an Amazon gift card, I can continue to feed my obsession.

is my latest purchase. And . Oh, and is on my wish list.

What’s on your wish list?

Get More: Et cetera 10 Comments

Kids in the Kitchen with Pizza

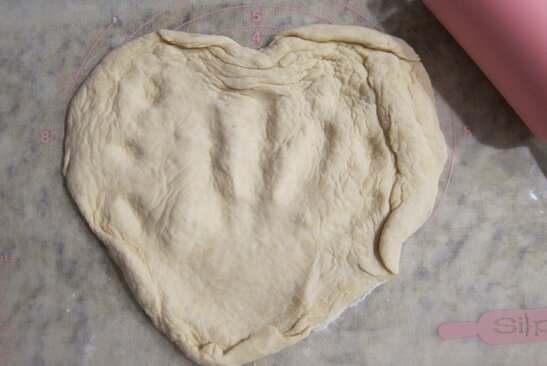
Lately our family’s love of pizza has shifted to an obsession. We’ve grilled pizza (and burned it). We’ve tested bread flour versus all-purpose flour (bread flour won). Instead of discussing the day’s ins and outs at the dinner table, we endlessly discuss pizza. But of all the benefits of our obsession, the sweetest one is Little GG’s love of, well, heart pizzas. If you follow me on , you’ll know that Little GG started shaping heart pizzas for herself just before Valentine’s Day. Now we can’t get her out of the kitchen.

Which leads me to this post: if you want to get your kids into the kitchen, let them bake pies. Pizza pies!

How to Make Pizza with Kids

  1. Prep the dough using this recipe, or your favorite store-bought dough. (Note: I usually only allow 2-4 hours for the first rise, and things work out just fine. See below for more details.)
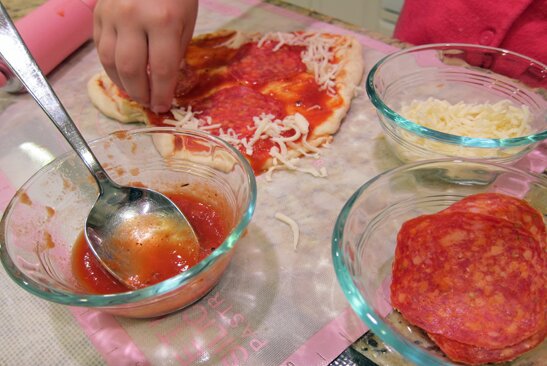
  2. Prep the ingredients. It’s easiest for kids if you give them choices but with guidelines: measure out the sauce into a small dish, but let them decide how much to put on their pizza. Sort ingredients including meats, veggies and cheese the same way.
  3. Give your child a rolling pin and floured work surface and let them decide how to shape their pizza.
  4. Prep a pizza pan with baking spray, transfer the dough to the pan, and let them dress their pizza.
  5. Bake and serve!

This is our current go-to recipe, straight out of Jim Lahey’s no-knead handbook, . (I’ve already pre-ordered his pizza book, .)

Prep couldn’t be easier – toss the dry ingredients together, mix in the water and let rise for anywhere from two to four hours (my guidelines, not his). A few flops around a lightly floured work surface, another 30 minute rest, and you’re good to go. I usually make the dough around lunchtime, but I work from home. I’m guessing you could make the dough before heading out the door in the morning and leave it to rise all day – and believe me when I say that “making the dough” is really throwing a few ingredients together in a bowl, which takes all of, say, six minutes. Surely you have that much time to spare for something as obsession-worthy as pizza?

Get More: Appetizers, Et cetera, Salads, Tips & Techniques 3 Comments

Happy Valentine’s Day!

Is your heart all a flutter? Mine is, just thinking about my two funny Valentines does that to me. This year Little GG and I are on our own and since her taste buds run more to mac and cheese than do mine, I’m dreaming up my ideal Valentine’s Day dinner instead.

I’d start with the steakhouse steaks I featured a few weeks ago as part of the SoCal Lady Bloggers virtual dinner. And with San Diego wet with rain, an indoor dish sounds perfect (although I was at the beach Sunday and grilled out Saturday…don’t go thinking we’ve got tons of rain down here!).

Then I’d add either these french fries or these fancy roasted potatoes – either way, potatoes for sure. I’d probably throw in some asparagus, just to be green, but honestly, I could eat meat and potatoes and be done with it.

Mr. Gonzo has ordered some fabulous wines lately, but I’d still prefer my toast to be of the Champagne variety, particualary the one we drank the night we got engaged: Veuve Clicquot.

And while dessert doesn’t make me swoon, I wouldn’t say no to a truffle or two. Or maybe I can get Little GG to whip up some chocolate cupcakes. After all, the Valentines who cook together, stay together. Happy Valentine’s Day!

Get More: Menus 2 Comments

{recipe} Cottage Cheese Guacamole

I have a confession to make: I had absolutely no clue about who was playing whom in the Super Bowl yesterday. (Although I was jazzed to see Madonna perform! See, I knew that much at least.) What I was excited about was spending the afternoon with friends. After all, the Super Bowl is nothing if not a legitimate reason to enjoy a beer or two before the more civilized hour of 5:00.

My friend Jessica had a Mexican theme going with fajitas on the grill and margaritas by the pitcher. So naturally my thoughts turned to chips and guacamole. And while I didn’t have time for a run to my favorite farmer’s market for my fave chips and guac, I did have a passel of fresh avocados ripening on my counter. The caveat? I only had five, not nearly enough to make guacamole for a block party. However, I also had a Costco-sized container of cottage cheese. Armed with a recipe from my favorite vegetarian cookbook, , I made enough low-fat, high-protein guacamole for an army. All with only five avocados. Not bad for a girl who doesn’t know her Patriots from her Giants.

Cottage Cheese Guacamole
4.5 from 2 reviews
Print
This recipe makes enough guacamole to serve an entire block party. Consider halving the recipe for smaller groups. Adapted from .
Ingredients
  • 5 ripe avocados, flesh removed
  • 2 ½ cups low-fat cottage cheese
  • Juice from 3 limes
  • ¼ cup chopped scallions
  • 5 garlic cloves, roughly chopped
  • Generous handful of fresh basil leaves
  • 2-3 teaspoons kosher salt
  • ½ teaspoon crushed red peppers
Instructions
  1. Combine all ingredients in the bowl of a food processor, pulse until smooth.
  2. Serve with tortilla chips or even carrots and celery sticks.


Get More: Appetizers 10 Comments